Hello there lovely’s! I’m sorry that I have been long neglecting posting! Life can get out of hand sometimes, I was told that I am going to go completely deaf. Which is scary! But I am strong and I am going to be okay.
Now the reason for this post is to show all you lovely gals and perhaps guys how to make your own mini chandelier for your dorm!
If your room is set up similar to mine I have an outlet right next to my bed, this makes a nightlight and phone charger perfect at night! They are really simple to make and really add a razzle dazzle to your humble dorm home. These could also be fun to make with some friends, or sorority sisters, and perhaps make some and sell in your building.
Alright lets get started!
Items required:
– 14 Size 2 Safety Pin
– Tri-beads
– small faceted round beads
– 2 pieces of 20 gauge wire approximately 7 inches in length.
– needle nose pliers
STEP 1
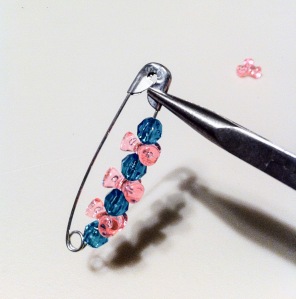
Put your beads on the wire. You can see the pattern here! But I’m sure you could be creative and make your own beading pattern. When choosing colors you could pick school colors, sorority colors, or simply your favorite colors like I did here!
STEP 2
Take your needle nose pliers now and crimp the opening (where you close the safety pin) closed so it cannot come open, this will aid you later on while you are putting it together it also helps it last longer.
STEP 3
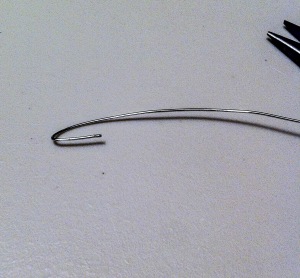
Round one end of the wire with your pliers so that when you are stringing the safety pins and beads they wont fall off the end of the wire.
STEP 4
Start stringing your pins and beads on the wire, on the small side of the safety pin (the side that doesn’t open or close) it should be tri-bead, pin, tri-bead, pin… etc.
STEP 5
Now once you have all 14 pins strung with the tri-beads between it is time to tighten it. Use your hands to pull it pretty tight then use your pliers to twist it as tight as you can and tuck the wire where it wont stab you.
STEP 6
Okay so flip all your pins to where they are facing the same direction. Here is an example of what you should be seeing right now.
STEP 7
You are doing the same ting as before, only now the round beads will be used between each pin.
STEP 8
Once you have strung the other end of the pins you tighten the wire and tuck the strand away just like you did in STEP 5. Here shows you what it will look like sitting on the light.
STEP 9
Finally! Plug that baby in and enjoy how pretty it is and how awesome you are for making it yourself. Every time a friend comes over they will ask what it is, and then once you show them they will tell you how cute it is. Which you can say “Thanks, I made it!” They will be surprised and you will feel proud.
If you feel overwhelmed about this project, take a deep breath. I am debating posting kits on my Etsy store, and maybe some pre-made ones.
Thank you guys for reading how to make your own mini nightlight chandelier.
Subscribe to keep up to date on all posts!
Keep it crafty out there!!!


