Color Blocked Terracotta Planter

Hello everyone! I really hoped you enjoyed my last post about the gold-rimmed terracotta planter DIY. You can find that here if you haven’t gotten to view it yet.

This DIY builds upon the gold-rimmed terracotta planter I mentioned above.
For those of you who cannot find or do not have the brown terracotta pots where you are, this is a fix for that not so pleasant orangey terracotta color. Combining two really chic trends right now: gold rim and color blocking!
This DIY can also be used on other planters that you find plain, boring, or ugly.

Let’s begin!

Color Blocked Terracotta Planter

What you need: 
– Terracotta Planter
– Acrylic Paint
– Sealer (optional)

Steps:
1. Prep your pot by washing and drying it.
2. Prep your work area to prevent paint from getting on anything of value.
3. Paint you planter! I started with the larger end and then did the rim last.
4. Seal and protect. (optional) Remember to do this part outside or in a well ventilated area.

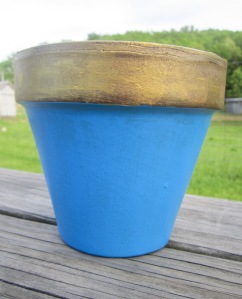
This is what you should have!

color blocked terracotta planter

I am super happy with how this turned out! At first I though this was going to be a bust, but once it was done it grew on me and now it is honestly one of my favorite and most simple DIY’s!

This is wonderful to turn an ugly or plain planter into something stylish and chic that you will want to look at and plant something in!

Get out there and get painting!
Happy crafting!

Gold Rimmed Terracotta Planter

Firstly, I apologize for not posting in so stinking long! I honestly thought that this blog was a mess up on my part, that no one would be interested, but it is actually pretty popular! So I have decided to keep it going this summer with MORE POSTS! So get your DIY ready and let’s do this!

So I don’t know about you all, but I appreciate plants. They make me feel happy looking at them, and it gives me a sense of pride knowing that I grew them and they survived! But let’s face it, juggling school work, work, extra curricular activities, and a social life leaves little time to think about watering a plant.
Do not fear! Mae has got you!
Cactus and succulents are easy to care for plants that require little water and management which make them great choices for someone who leads a busy lifestyle such as myself and many of you!

At my local Wal-Mart this past weekend I found they had a multitude of succulents for $2.50 a piece! So I grabbed 3 of them of different looks. For my pot I found a larger one at Lowes for $1.99 in a relaxing shade of purple. I easily got some soil and transplanted them all into the pot in about 5 minutes. Now I know what you are thinking, “But I don’t have the space for a larger pot in my tiny dorm or apartment!” Don’t worry, I hear ya!

Well that is where we get to the DIY portion! This is a super easy and budget friendly DIY that can make such a difference in your apartment, dorm, or home!

Gold Rim Terracotta Pots
As the name suggests this is a very simple DIY.
What you will need:
– Terracotta Pot
– Gold Acrylic Paint
– Some Sealer (if you plan on putting it outside or worry about chipping)

Steps: 
1. Prep your pot by washing it and drying it off.
2. Get you a nice work area ready. I dropped some newspapers on the floor and painted mine.
3. Use your gold paint to paint the rim of your pot.
4. Let it dry.
5. Spray on some sealer. (OPTIONAL)

You are done!
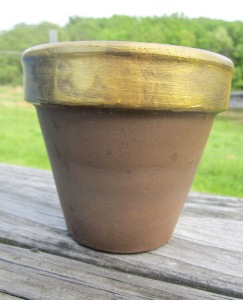
It should look like this:
Gold Rimmed Terracotta Pot

BEAUTIFUL! Now all it needs is a succulent!
For about 5 dollars you have a stylish pot and a happy little plant to liven up your dorm, apartment, or home!

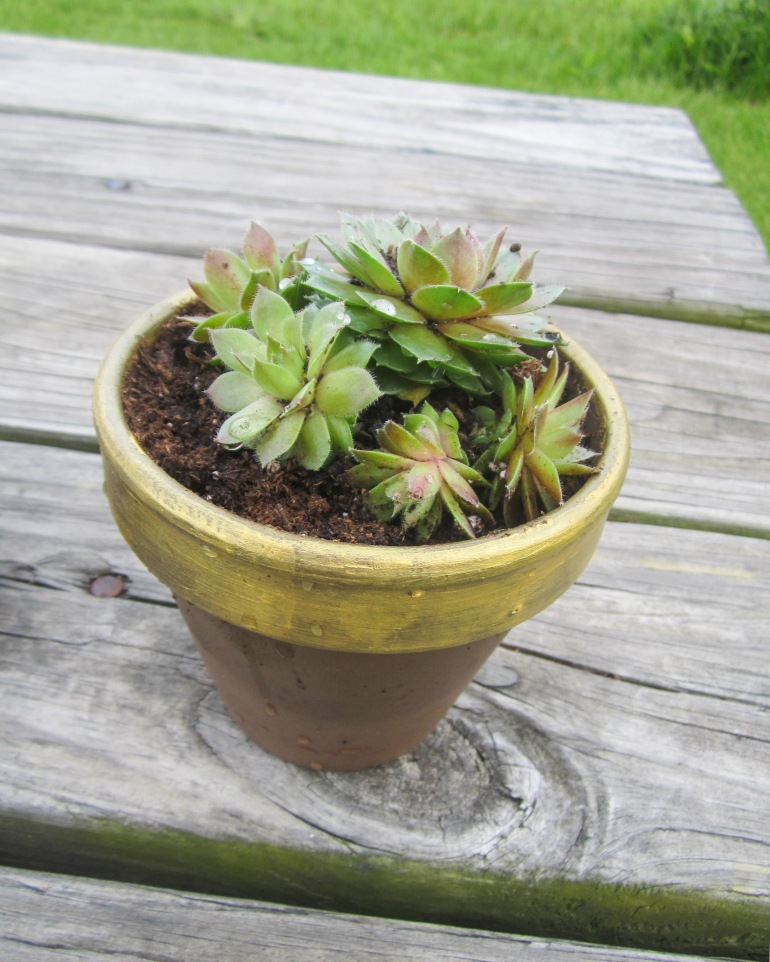
Gold Rimmed Planter

There it is with a hen and chicken plant in it. Make sure it is nice and clean and bring it inside to decorate!

If you enjoyed this or have tried this yourself please be sure to comment! And look for DIY College Chic on social media, I will be creating a twitter for it soon!

DIY Night Light Covers

Hello there lovely’s! I’m sorry that I have been long neglecting posting! Life can get out of hand sometimes, I was told that I am going to go completely deaf. Which is scary! But I am strong and I am going to be okay.

Now the reason for this post is to show all you lovely gals and perhaps guys how to make your own mini chandelier for your dorm!

If your room is set up similar to mine I have an outlet right next to my bed, this makes a nightlight and phone charger perfect at night! They are really simple to make and really add a razzle dazzle to your humble dorm home. These could also be fun to make with some friends, or sorority sisters, and perhaps make some and sell in your building.

Alright lets get started!

IMG_2018_edited

Items required:

– 14 Size 2 Safety Pin

– Tri-beads

– small faceted round beads

– 2 pieces of 20 gauge wire approximately 7 inches in length.

– needle nose pliers

STEP 1
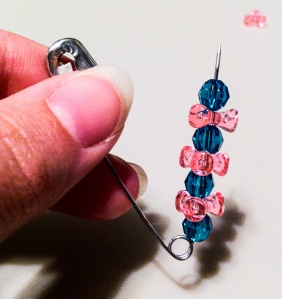
IMG_2024_edited

Put your beads on the wire. You can see the pattern here! But I’m sure you could be creative and make your own beading pattern. When choosing colors you could pick school colors, sorority colors, or simply your favorite colors like I did here!

STEP 2
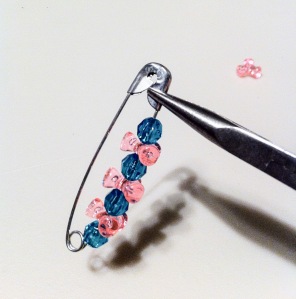
IMG_2026_edited

Take your needle nose pliers now and crimp the opening (where you close the safety pin) closed so it cannot come open, this will aid you later on while you are putting it together it also helps it last longer.

STEP 3

IMG_2032_edited


Round one end of the wire with your pliers so that when you are stringing the safety pins and beads they wont fall off the end of the wire.

STEP 4

IMG_2036_edited


Start stringing your pins and beads on the wire, on the small side of the safety pin (the side that doesn’t open or close) it should be tri-bead, pin, tri-bead, pin… etc.

STEP 5

IMG_2042_edited

Now once you have all 14 pins strung with the tri-beads between it is time to tighten it. Use your hands to pull it pretty tight then use your pliers to twist it as tight as you can and tuck the wire where it wont stab you.

STEP 6

IMG_2048_edited

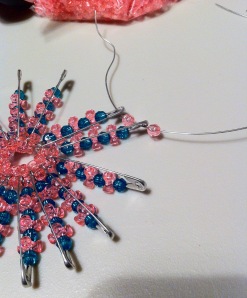
Okay so flip all your pins to where they are facing the same direction. Here is an example of what you should be seeing right now.

STEP 7
IMG_2052_edited

You are doing the same ting as before, only now the round beads will be used between each pin.

STEP 8

IMG_2056_edited

Once you have strung the other end of the pins you tighten the wire and tuck the strand away just like you did in STEP 5. Here shows you what it will look like sitting on the light.

STEP 9

IMG_2062_edited

Finally! Plug that baby in and enjoy how pretty it is and how awesome you are for making it yourself. Every time a friend comes over they will ask what it is, and then once you show them they will tell you how cute it is. Which you can say “Thanks, I made it!” They will be surprised and you will feel proud.

If you feel overwhelmed about this project, take a deep breath. I am debating posting kits on my Etsy store, and maybe some pre-made ones.

Thank you guys for reading how to make your own mini nightlight chandelier.

Subscribe to keep up to date on all posts!

Keep it crafty out there!!!

DIY Flower Mirror

DIY Flower Mirror

(Shhhh! Its made from Dollar Store Items!)

Dorm Room Decor Spoon Flower Mirror Dollar Store DIY

Hello there my college companions!

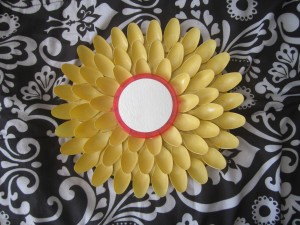
Today I am going to show you how to make a fabulous flower mirror (made from plastic spoons!). I know that you may be almost a month into college like me, or you may have started like a week ago! Either way, if you are like me I am always hunting, scouring for that magical piece that makes a room whole, or adds a little touch of personality to the sad bland dorm. This mirror is made all from either recycled, or dollar store items! Yes you heard me right ladies.

Spoon Flower Mirror DIY Dollar store Flower Mirror DIY Dorm Decor

Project Level: Freshmen (Easy)

Time needed: Saturday afternoon worthy

Cost: Aprox. $3.00

What you will need:

  • Plastic Spoons (Clear works best!)
  • Spray Paint (Any color, just make sure it is okay for plastic!)
  • Hot glue
  • Hot glue gun
  • Mirror
  • Scrap of ribbon
  • Cardboard (An unwanted box works really well!)
  • The perfect place to hang it!

Steps:

  1. Gather your materials.  I got most of my materials at the local Dollar Tree, I already had my glue gun, left over spray paint, an old box, and scrap ribbon.  But if you do not have those items do not fret! They can be easily obtained for almost nothing.
  2. Cut your old box (cardboard) into a circle.  My circle was not perfect, it doesnt have to be perfect, just cut it to the aproximate sie you want your flower to be. My circle is about 14 inches in diameter.
  3. Now that your circle is cut it is time to relieve some of that weekly stress! Its time to break some spoons! I found it easiest to break them by holding the spoon over a like a scrap of cardboard bowl part facing down, and to apply pressure to the neck of the spoon, so it breaks leaving you the bowl and some of the handle.  I found this way makes it easier to get a clean break. Dont worry if yous snap a few of the bowls during this part.  You should have plenty of left overs.
  4. Time to glue those spoons!  Start around the outer edge and work inward.  Be sure to leave a space for your mirror to fit!
  5. Now that your spoons are all glued you should have a clear flower.  Time to take that bad boy outside to spray down!  Just try to give it a nice even coat trying to hide the cardboard and avoid getting little paint pools in your spoons.
  6. Let dry!
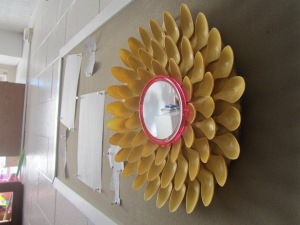
  7. Once your flower has completely dried take it inside and hot glue your mirror to the center. It is starting to look pretty awesome by now. DIY Spoon Mirror Dorm Decor
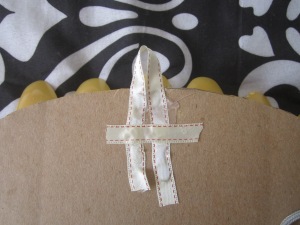
  8. Cut or grab a scrap of ribbon. Flip your flower over and hot glue the ribbon in a loop shape on the cardboard where you want the hook to be when you hang it.

Flower Mirror DIY Dorm decor Spoon Flower Mirror Dorm Decor

9. Admire your amazing handy work, and hang it on your wall for all your roommates, Sorority Sisters, friends, and random bystanders to ooo and ahh at.

Dollar Store DIY Spoon Mirror

There you have it! If anything is unclear or you need another explanation shoot me comment, or check out http://www.craftaholicsanonymous.net/spoon-mirror-tutoria/ .

Keeping you fabulous for less!

-Maeghaen-Kaytlyn