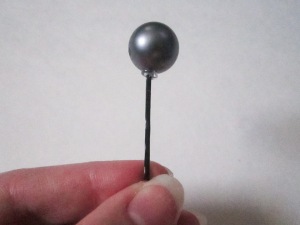
DIY Large pearl Bobby Pins

I hope you all are all enjoying the start of your summers! I do not know if everyone is off for summer holiday yet, but if you are not it should be around the corner. Unless you live in the southern hemisphere and are about to start winter. Maybe I should do a winter in summer DIY for those of you on the southern hemisphere. What do you think?

Today is another hair accessory DIY, I will be showing you how to make THE EASIEST hair accessories EVER! And they look gorgeous in your hair which is a big plus.

For this DIY you will us a glue gun! We all love our easy peasy glue gun DIY’s, I know I do.

In all honesty you could get all the items necessary at a local dollar store which makes this a wonderful Dollar Store craft!
This DIY cost me in all about a dollar. There is no reason not to make this DIY!

Without further ado let’s get started!

Large Pearl Bobby Pins

What you will need: 
IMG_0592_edited

– Bobby Pins
– Pearl Beads (mine came out of a dollar bag from Wal-Mart)
– Glue Gun

Steps: 
1. Gather your materials.
2. Add some glue to the end of your bobby pin.
3. Press your pearl bead onto the glue.

IMG_0595_edited

4. Let dry completely.
5. WEAR!

IMG_0628_edited

I have simply put them into a bun as you can see here.

IMG_0634_edited

And you can wear as many or as few as you want!

IMG_0638_edited

I hope you all enjoyed this DIY! If you did please be sure to like, share, pin, and tweet about us with your friends!
If you make your own pearl bobby pins please be sure to post it on twitter and use the hash-tag #collegechicpearlbobbypins so I can see your beautiful works!

Do you think making your own hair accessories are better than purchasing them from a store? Let me know in the comments below!
Have a good summer all!

Color Blocked Terracotta Planter

Hello everyone! I really hoped you enjoyed my last post about the gold-rimmed terracotta planter DIY. You can find that here if you haven’t gotten to view it yet.

This DIY builds upon the gold-rimmed terracotta planter I mentioned above.
For those of you who cannot find or do not have the brown terracotta pots where you are, this is a fix for that not so pleasant orangey terracotta color. Combining two really chic trends right now: gold rim and color blocking!
This DIY can also be used on other planters that you find plain, boring, or ugly.

Let’s begin!

Color Blocked Terracotta Planter

What you need: 
– Terracotta Planter
– Acrylic Paint
– Sealer (optional)

Steps:
1. Prep your pot by washing and drying it.
2. Prep your work area to prevent paint from getting on anything of value.
3. Paint you planter! I started with the larger end and then did the rim last.
4. Seal and protect. (optional) Remember to do this part outside or in a well ventilated area.

This is what you should have!

color blocked terracotta planter

I am super happy with how this turned out! At first I though this was going to be a bust, but once it was done it grew on me and now it is honestly one of my favorite and most simple DIY’s!

This is wonderful to turn an ugly or plain planter into something stylish and chic that you will want to look at and plant something in!

Get out there and get painting!
Happy crafting!

Being D.I.Y. Chic

Part of being DIY chic is taking every objects and transforming them into amazing creations with a few craft supplies and a ton of imagination!

I am a college student just like you, so I am busy as well, I will try to post as often as possible.

Here are upcoming posts:

– Fake Toms

– How to sew a button

– Fake designer necklace
So those are all exciting!  I am probably most excited about them! Stay tuned!

I have just started this blog, so if you like it tell your friends, your roommate, your whole floor even!  I will be making a flyer soon, you can print it and post it on your floor or building if you want to be a friend!

Download the flyer below and post it wherever you please!

DIY COLLEGE CHIC FLYER

I will have a follow button up ASAP! Don’t forget to follow me!